Linux Log Management With Graylog
I’ve been searching the web for a free and open-source log monitoring solution for Linux for a while now. I’ve tried everything from Nagios to Kibana. However I found out the best solution for me is Graylog. I basically just want to manage web server and mail server logs and get alerts if certain conditions are met. So Let’s take a look at Linux log management with Graylog.
Although the official Graylog documentation is great, I’ve found out it has some shortcomings when it comes to explaining how to actually transfer the logs from your own servers to the intended master Graylog server, especially if you’ve never done this before (like me!). If you’re not familiar with Syslog for example, you’re gonna have a hard time configuration just by following the official docs. That’s why I wanted to document how I approached it which is very bare bones and simple.
Getting Started
So here’s what we’re going to do. We’re planning to transfer all of our logs from a server to a Graylog node, using Rsyslog as the transfer protocol.
For setting up a Graylog node we’re going to use a Ubuntu 20.04 virtual machine with 2 Gigabytes of ram and 2 CPU cores. Keep in mind that this is just for testing purposes. In a production environment, you’re going to need a much more powerful server, most likely dedicated.
Installing Graylog on Ubuntu 20.04
First we’re going to start by installing the prerequisite packages. Run the following commands:
sudo apt-get update && sudo apt-get upgrade
sudo apt-get install apt-transport-https openjdk-8-jre-headless uuid-runtime pwgen
If you get a “package not found” error, you need to add the universe repositry as so:
sudo add-apt-repository universe
sudo apt-get update && sudo apt-get upgrade
sudo apt-get install apt-transport-https openjdk-8-jre-headless uuid-runtime pwgen
Install MongoDB
Next step is to install MongoDB via the following commands:
sudo apt-key adv --keyserver hkp://keyserver.ubuntu.com:80 --recv 9DA31620334BD75D9DCB49F368818C72E52529D4
echo "deb [ arch=amd64 ] https://repo.mongodb.org/apt/ubuntu bionic/mongodb-org/4.0 multiverse" | sudo tee /etc/apt/sources.list.d/mongodb-org-4.0.list
sudo apt-get update
sudo apt-get install -y mongodb-org
After the installation is complete, enable it and verify its running correctly.
sudo systemctl daemon-reload
sudo systemctl enable mongod.service
sudo systemctl restart mongod.service
sudo systemctl --type=service --state=active | grep mongod
Install Elasticsearch
Graylog uses Elasticsearch 7 to manage the logs. You can install it via the following commands.
wget -q https://artifacts.elastic.co/GPG-KEY-elasticsearch -O myKey
sudo apt-key add myKey
echo "deb https://artifacts.elastic.co/packages/oss-7.x/apt stable main" | sudo tee -a /etc/apt/sources.list.d/elastic-7.x.list
sudo apt-get update && sudo apt-get install elasticsearch-oss
Then make the following changes to the to the configuration file.
$ sudo tee -a /etc/elasticsearch/elasticsearch.yml > /dev/null <<EOT
cluster.name: graylog
action.auto_create_index: false
EOT
Install Graylog
Finally, we can add the Graylog repository and install it using these commands.
$ wget https://packages.graylog2.org/repo/packages/graylog-4.0-repository_latest.deb
$ sudo dpkg -i graylog-4.0-repository_latest.deb
$ sudo apt-get update && sudo apt-get install graylog-server graylog-enterprise-plugins graylog-integrations-plugins graylog-enterprise-integrations-plugins
Edit the configuration file
There are a couple of changes we need to make to the Graylog configuration file before we can start it. Open the config file using your favorite text editor:
sudo nano /etc/graylog/server/server.conf
Here are the changes we need to make:
- Find the password_secret parameter. You can create a password for this section with this command: pwgen -N 1 -s 96 This parameter is used when creating a cluster for Graylog so make sure you save the password.
- root_password_sha2 has your desired password and save it here. Use this command to hash your password: echo -n yourpassword | shasum -a 256 Definitely save this password. You will need it to log into the control panel.
- I would suggest specifying the time zone as well with the root_timezone
- You can also choose the username for the panel with the root_username directive, but this is not required. The default username is admin
- If you want to have access to the control panel from other locations, you need to change the http_bind_address. Change it from 127.0.0.0 to the IP address of your server
Start Graylog
Finally, we’re ready to start the Graylog server. Run the following commands.
$ sudo systemctl daemon-reload
$ sudo systemctl enable graylog-server.service
$ sudo systemctl start graylog-server.service
$ sudo systemctl --type=service --state=active | grep graylog
Server Firewall configuration
There are at least two ports that need to be opened with this configuration. Depending on what protocol you use for transfer of logs , you might need to open the corresponding ports.
On Ubuntu with the UFW firewall, you can open ports very easily like this:
ufw allow 9000/tcp
ufw allow 514/tcp
Port 514 is the Rsyslog port which will be specified in the configuration. Port 9000 is the web interface for Graylog which we will get to later. If you’re using UDP for the transfer of the files, change the rules to UDP instead of TCP
Reload the firewall to apply the rules:
ufw reload
Then check the configuration to make sure
$ ufw status

To                         Action      From
--                         ------      ----
9000/tcp                   ALLOW       Anywhere
22/tcp                     ALLOW       Anywhere
514/tcp                    ALLOW       Anywhere
Client configuration with Rsyslog
Rsyslog is a protocol for managing logs on Linux servers, and its installed by default on most distributions including Ubuntu. Using Rsyslog, we can transfer all or some of logs of a server to another server like Graylog so we can perform analysis.
Here’s how I configured a CentOS server to send all of its logs to the Graylog server we just configured.
First, navigate to the Rsyslog configuration directory:
cd /etc/rsyslog.d
Create a new configuration file and open it.
nano 01-client.conf
and copy the content below inside the file:
## GTLS driver
$DefaultNetstreamDriver gtls
# Certificates
$DefaultNetstreamDriverCAFile /etc/ssl/rsyslog/CA.pem
$DefaultNetstreamDriverCertFile /etc/ssl/rsyslog/client-cert.pem
$DefaultNetstreamDriverKeyFile /etc/ssl/rsyslog/client-key.pem
# Auth mode
$ActionSendStreamDriverAuthMode x509/name
$ActionSendStreamDriverPermittedPeer [server-hostname]
# Only use TLS
$ActionSendStreamDriverMode 1
# Forward everything to destination server
*.* @@[server-IP]:514
The key setting here is the SSL keys. It is highly encouraged to use SSL to transfer the logs across the network. If you don’t use SSL, the log will transfer in a clear-text format and can be readable by anyone who has access to either nodes, or has access to your network in transit. (e.g your ISP).
Issue two SSL certificates for your hostname. One for your server and one for client. For example server.yourdomain.com and client.yourdomain.com. If your server and client on part of the same domain, you could use a single Wild Card certificate for both.
Start Rsyslog
After your save the configuration file, make sure to install the rsyslog-gnutls package as well.
apt install rsyslog-gnutls
Finally restart Rsyslog to apply the configuration.
systemctl restart rsyslog.service
Now to make sure everything is running smoothly, check the status with this command. If there are any errors, you should see them.
journalctl -f -u rsyslog
Graylog web interface configuration
Now that everything is setup and running smoothly (hopefully), we can begin receiving logs in the Graylog interface.
Navigate to the web interface by opening the server IP via port 9000 in the URL bar of your browser:
http://127.0.0.1:9000
If you’ve defined your server IP in the configuration, replace it with 127.0.0.1
If everything goes will you will be greeted with this page:
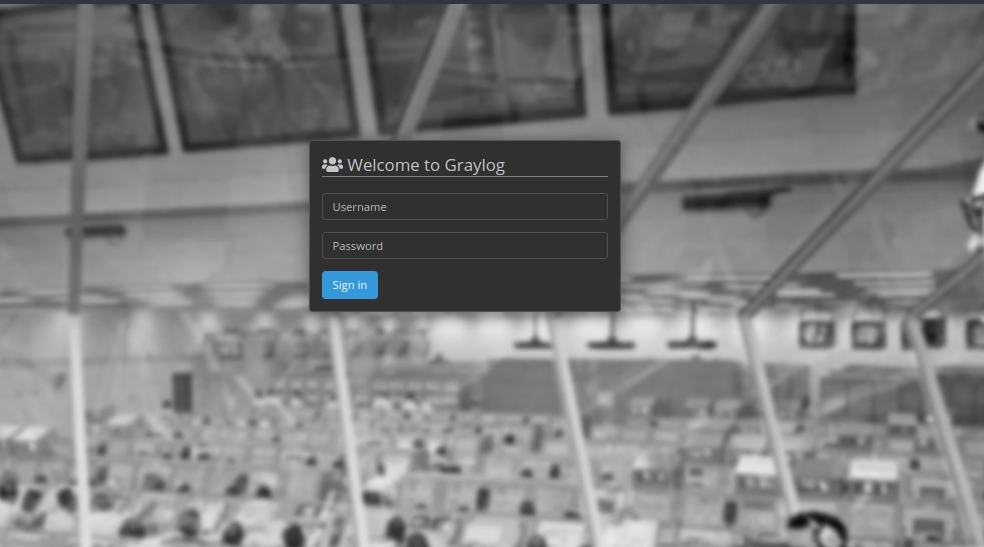
Enter admin as the default username and the password you created in the configuration file under the root_password directive.
Adding an Input with Rsyslog
So far we’ve configured our client to send its log to the Graylog server, but we need to add that as an input in order to process it within Graylog.
After logging in the Graylog interface, go to the System tab and click on Inputs.
From the drop down menu, click “Syslog TCP” and then click the Launch “New Input” button.
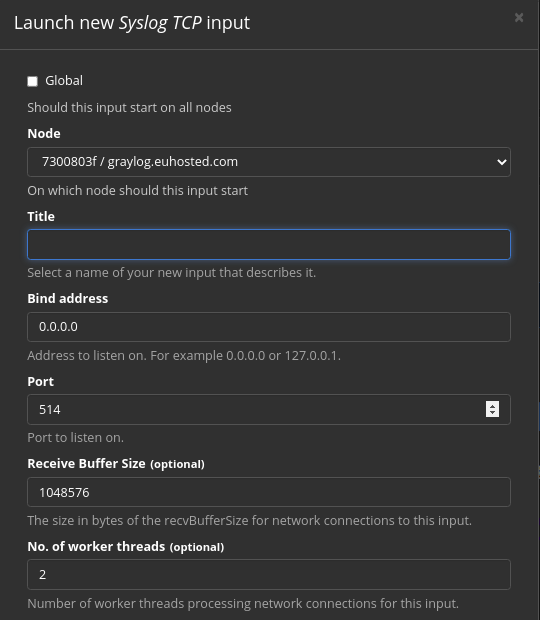
- The first field is your Graylog node. Since we only have a single Graylog server, you don’t need to select anything.
- In the Title filed just select a name for your input – for example Rsyslog.
- You can leave the IP on 0.0.0.0 sine we want to listen to Rsyslog inputs over the public IP.
- The default port for Rsyslog is 514 so leave this field unchanged.
- Important Note: In order to use port 514, you need to run Gray log as the root user which is not recommended. If Graylog isn’t running as root, port 514 won’t likely work. You can change it to something else for example 5514. However. make sure that you specify the new port in your client Rsyslog configuration file.
- Leave the rest of the fields at default setting.
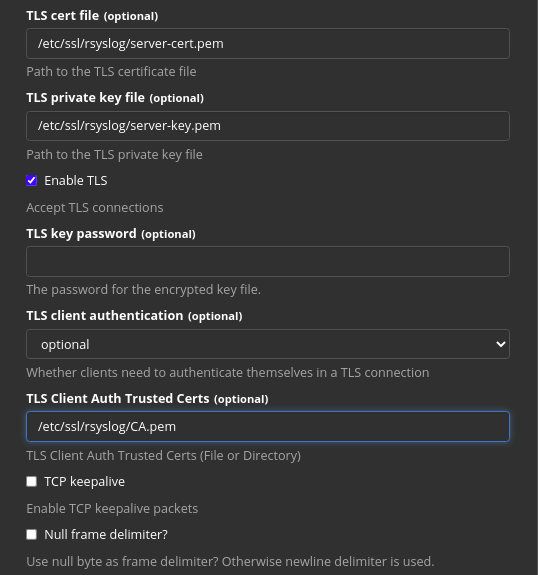
- TLS cert file: The path to the certificate file for your server.
- TLS private key: The path to the private key.
- The TLS client Auth Trusted Certs: The path to the CA certificate. Make sure to include the root certificate in this file as well because Graylog can’t retrieve it from the web.
The rest of the configuration is up to you but only these mentioned parameters are crucial and needed.
You’re not required to use *LINK SSL/TLS certificate, but if you don’t, all of your logs will be transferred in clear-text format which is far from ideal.
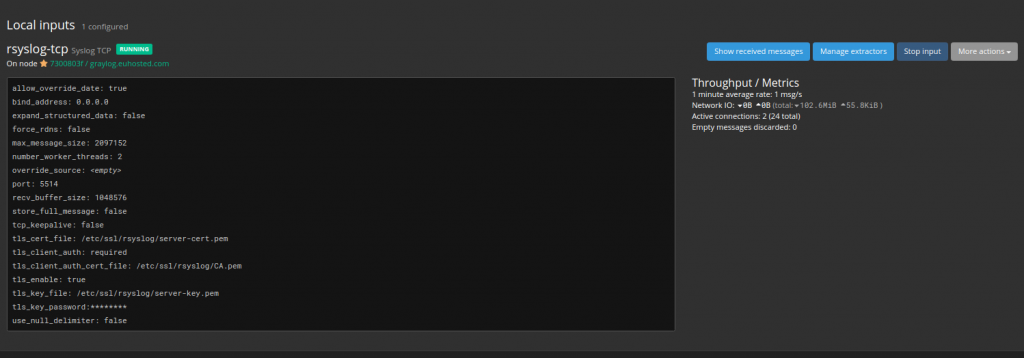
After adding the input you should see this section with the input correctly running:
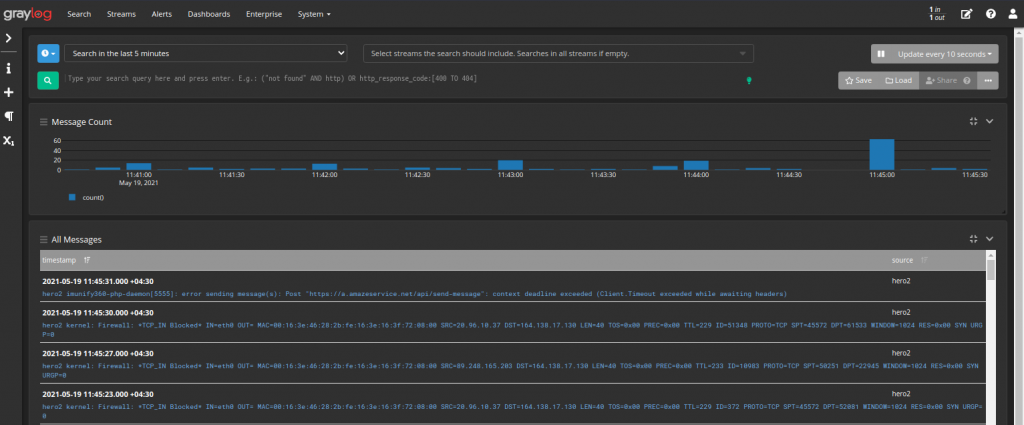
Now navigate to the homepage of Graylog and you should see the logs coming in:
Conclusion
So that’s all! We now have full graylog node running and recieving inputs from Rsyslog on the node. You can continue to add new servers. Just forward the logs using the same method to the Ryslog port from the client.
Based on personal experience I’ve found Linux log managment with Graylog to be the best for my intentions and the easiest.
There is range of graphs and alert systems that you can create in Graylog which is well beyond the scope of this post. I suggest checking out the official docs to get familiar with it, or just play around with the settings!